How to Clean Cloth Car Seats at Home Like a Pro Detailer

Yes, you can clean cloth car seats at home with a vacuum, soft brush, upholstery cleaner, and patience. Vacuum first, pre-treat stains, clean in small sections, rinse thoroughly, and let the seats dry completely before use.
Learning how to clean cloth car seats at home is one of the most practical interior-care skills a car owner can pick up, and it doesn’t require a professional detailing bay or expensive equipment. Fabric seats absorb spills, road dust, sunscreen, and everyday grime that can dull the cabin and trap odors over time. With the right supplies and a methodical approach, you can restore a noticeably cleaner, fresher interior in a single afternoon — and keep it that way with a simple maintenance routine.
- Check the fabric code: Look for the W, S, WS, or X label under your seat before choosing.
- Vacuum before liquids: Brush and vacuum twice to remove embedded grit that turns to mud when wet.
- Rinse is essential: Leftover cleaner residue attracts new dirt, so always flush with clean water.
- Dry fully: Allow 6 to 12 hours of airflow; avoid heat that can shrink fabric or.
- Protect afterward: A fabric protectant helps future spills bead up instead of soaking in.
Can You Clean Cloth Car Seats at Home? (Yes, Here’s How)
Yes — cloth seats are actually one of the more forgiving interior surfaces to clean at home, provided you follow a few ground rules. Unlike leather, which can crack or stain if you use the wrong product, most factory fabric upholstery is durable enough to handle a proper water-based cleaning routine. The key is matching your cleaner to the fabric type, avoiding over-wetting, and giving the seats enough time to dry completely.
Surface Compatibility: Check the Fabric Label First
Before you spray anything on your seats, find the fabric care label. On most vehicles, it’s tucked under the seat cushion, along the lower edge of the seat base, or inside the seatback seam. Look for the manufacturer’s cleaning code, which is usually one of four letters:
- W: Water-based cleaners are safe to use.
- S: Use solvent-based cleaner only — water can damage the fabric or cause shrinkage.
- WS: Both water- and solvent-based cleaners are acceptable.
- X: Vacuum only; do not use any liquid cleaner.
If you can’t find a label, test any cleaner on a small, hidden section of the seat — like the lower side bolster — before committing to a full clean. This also gives you a chance to check for colorfastness, so you don’t discover a faded spot in the middle of the seatback halfway through the job.
Ventilation and Safety Precautions
Cleaning solutions, especially solvent-based ones, release fumes that can be irritating in an enclosed cabin. Work with the doors open, or park in a well-ventilated garage or driveway. Wear gloves to protect your hands, and avoid mixing different cleaning products — combining chemicals can create dangerous fumes. Also keep in mind that your seats sit near electrical components, including seat sensors and airbag wiring. Never saturate the fabric to the point where liquid pools, and keep moisture away from the area under the seat.
Fabric seats in modern vehicles often house side-impact airbags in the outer bolsters, along with seat occupancy sensors and wiring. Avoid soaking these areas, and never direct a steam cleaner or extraction wand at the airbag seams. If you’re unsure where the airbag is located, check your owner’s manual before cleaning.
What You’ll Need to Clean Cloth Car Seats at Home

You don’t need a $500 extractor to get good results. Most of the supplies are probably already in your garage or laundry room, and the few extras are inexpensive.
Essential Supplies and Optional Tools
Optional upgrades include a wet/dry vacuum for extraction, a handheld carpet extractor, a steam cleaner, and a fabric protectant to apply after the seats are dry. If you’re cleaning a particularly dirty vehicle, a dedicated upholstery brush with stiff nylon bristles will agitate the fabric more effectively than a standard sponge. You may also want a small detailing brush for tight seams and crevices where crumbs and grit collect.
Step 1: Vacuum and Brush Away Loose Dirt First
Cleaning fabric without vacuuming first is a mistake. Dirt and sand sit deep in the weave, and if you apply liquid cleaner on top, you’ll turn that grit into mud that grinds into the fibers as you scrub.
Vacuuming and Brushing Techniques
Start by vacuuming the entire seat surface with a crevice tool, paying extra attention to the seams and the gap between the seatback and bottom cushion. Then go over the fabric with a soft-bristle brush using firm, circular motions to loosen embedded dirt. Vacuum again — you’ll be surprised how much more debris comes up the second time. Repeat this process on the seatback, headrest, and side bolsters. If your vacuum has adjustable suction, use a lower setting on delicate fabrics to avoid pulling the weave.
Step 2: Pre-Treat Stains and High-Traffic Areas
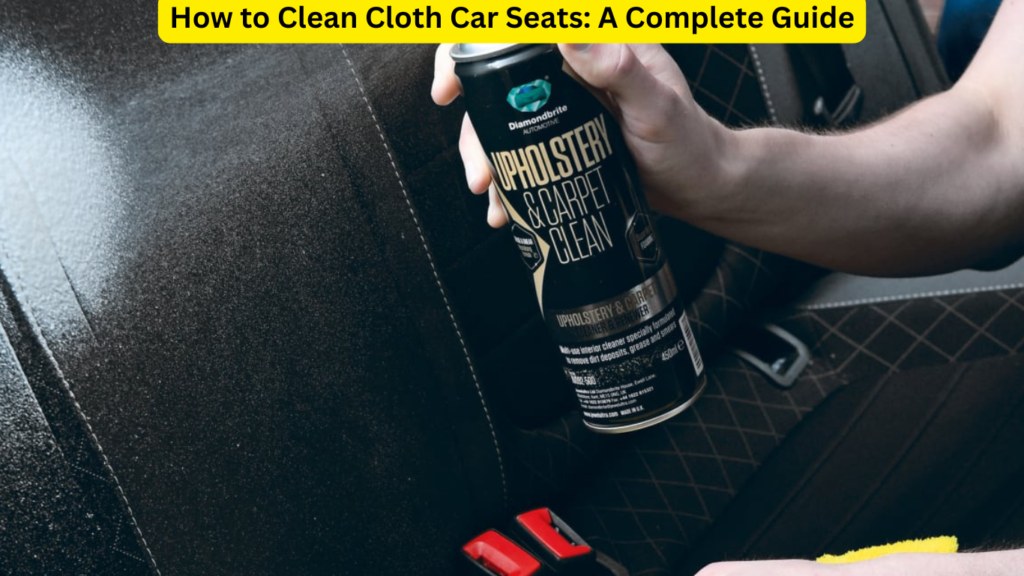
Once the loose dirt is gone, focus on the spots that need extra attention: coffee spills, food stains, makeup, or the darkened edges of high-traffic areas like the outer bolster and the rear of the seat base.
Choosing a Cleaner and Understanding Dwell Time
Select a cleaner that matches your fabric’s care code. For most factory cloth seats, a water-based upholstery cleaner is the safest starting point. Spray the product directly onto the stained area — don’t pour it on — and use a brush to work it into the fibers gently. Most upholstery cleaners list a recommended dwell time on the label; follow that rather than guessing. The goal is to let the cleaner break down the stain without letting it dry into the fabric. If the label says three to five minutes, set a timer and don’t walk away. For heavy stains, you may need a second application, but resist the urge to pile on more product than the label recommends.
For stubborn stains like coffee or grease, blot — never rub — with a clean microfiber towel before applying cleaner. Rubbing pushes the stain deeper into the fibers and can spread it across a wider area. Blot from the outside of the stain toward the center to keep it from spreading.
Step 3: Deep Clean the Fabric With Proper Technique
With stains pre-treated, it’s time to clean the entire seat surface. Work in small sections — the seat bottom, then the seatback, then the headrest — so the cleaner doesn’t dry before you finish agitating it.
Hand Scrubbing vs. Carpet Extractor
You have two main options for the deep-cleaning pass: hand scrubbing or a carpet extractor. Both work, but they suit different situations and budgets.
| Method | Best For | Key Consideration |
|---|---|---|
| Hand scrubbing | Light-to-moderate dirt, spot stains, quick maintenance | Requires more elbow grease and a thorough rinse to avoid residue |
| Carpet extractor | Heavy buildup, deep-set grime, faster drying | Higher cost; requires careful use to avoid over-wetting |
For hand scrubbing, spray the cleaner across a small section, work it in with a soft brush using overlapping passes, then blot with a microfiber towel. Move from one section to the next so you don’t leave partially cleaned areas. For an extractor, follow the machine’s instructions: spray the solution, agitate with the brush attachment, then pull the wand slowly across the fabric to extract the dirty water. Move the wand in straight lines and avoid lingering in one spot, which can oversaturate the cushion and soak the foam underneath.
Step 4: Rinse and Extract the Cleaning Solution
Rinsing is the step most people skip, and it’s the one that separates a professional-looking result from a dull, sticky mess.
Why Rinsing Prevents Sticky Residue
Upholstery cleaners contain surfactants that lift dirt, but if you leave the cleaner in the fabric, it dries into a sticky residue that attracts new dirt almost immediately. That’s why the fabric can look clean right after cleaning, then look dingy again within a week. To prevent this, go back over each section with a spray bottle filled with clean water, then extract it. If you’re hand cleaning, blot with a damp microfiber towel and then a dry one to pull out as much moisture and soap as possible. If you’re using an extractor, do a final pass with plain water in the solution tank to flush the fibers. You’ll know you’re done when the extracted water runs clear instead of sudsy.
Step 5: Dry the Seats Thoroughly
Drying is the slowest part of the process, but rushing it can cause real problems — including mildew, musty odors, and damage to the foam cushion.
Drying Methods and Mold Prevention
After cleaning, your seats should be damp, not soaked. Open all the doors, roll down the windows, and let the car air out. A box fan aimed into the cabin speeds things up considerably, and a dehumidifier in the garage works even better. Avoid using a heat gun or hair dryer on high heat — heat can shrink or distort some fabric blends. Wait until the seats are completely dry to the touch before using the car, and if you have heated seats, don’t turn them on to dry the fabric; the combination of heat and moisture can damage the heating element. In humid climates, give the seats extra time — fabric that feels dry on the surface can still hold moisture deeper in the cushion.
Applying Fabric Protectant for Longer-Lasting Results
Once the seats are fully dry, you can apply a fabric protectant designed for automotive upholstery. These products create a barrier that helps liquids bead up instead of soaking in, which makes future spills easier to clean. Spray the protectant evenly and follow the label instructions for drying time. Keep in mind that protectants wear off over time — reapplying every few months is normal, especially on seats that see daily use. If you regularly carry kids, pets, or drinks in the car, a protectant is one of the most effective ways to extend the time between deep cleans.
Common Mistakes to Avoid When Cleaning Cloth Seats
Most cleaning failures come down to a few repeatable mistakes that are easy to avoid once you know what to watch for.
- Vacuum and brush before applying any liquid
- Test cleaners on a hidden section first
- Rinse thoroughly to remove soap residue
- Let seats dry completely before using the car
- Over-wet the fabric or let liquid pool on the cushion
- Use stiff wire brushes or abrasive pads
- Soak side bolsters where airbags are housed
- Mix different cleaning chemicals together
Over-Wetting, Wrong Brushes, and Airbag Interference
Over-wetting is the most common mistake. Excess moisture sinks deep into the foam cushion, which can take days to dry and creates the perfect environment for mildew. It can also reach the sensors and wiring under the seat, potentially triggering warning lights or worse. The second common mistake is using the wrong brush — a stiff scrub brush designed for concrete or grout will shred fabric fibers and leave permanent fuzz. Stick to soft or medium nylon brushes. Finally, remember that side-impact airbags deploy from the outer edge of the seatback in many vehicles. Saturating that area with liquid isn’t just a cleaning mistake; it can interfere with the airbag’s deployment path. Keep the outer bolsters only lightly damp, and never spray cleaner directly into the seam where the airbag is housed.
How Often Should You Clean Cloth Car Seats?
There’s no single schedule that fits every driver, but a practical routine keeps fabric seats looking good without turning cleaning into a weekend chore.
Maintenance Schedule and When to Call a Professional
Vacuum the seats every two to four weeks, or weekly if you regularly carry kids, pets, or cargo. Spot-clean spills as soon as they happen — the longer a stain sits, the harder it is to remove. A full deep clean two to four times a year is a reasonable baseline for most daily drivers. If you live in a dusty area or commute with the windows down, lean toward the more frequent end of that range.
Some situations call for a professional detailer. Pet urine that has soaked into the foam, mold or mildew growth, and persistent odors that survive a thorough cleaning are all signs that the seat needs professional extraction equipment and possibly ozone treatment. If your fabric label reads “X” (vacuum only) and the seats are heavily soiled, professional cleaning is the safer route than attempting a DIY liquid clean.
If you’re weighing whether fabric seats are worth the extra upkeep compared to a different material, our breakdown of leather seats vs cloth seats covers the long-term trade-offs. And for badly stained seats that won’t come clean, some owners choose to cover the fabric instead of replacing it — our guide on how to install leather seat covers walks through the process. If your car has heated cloth seats, avoid saturating the cushion during cleaning, and check our guide on custom-fit seat covers for heated seats before adding any cover that could block the heating elements.
Most cloth seats can be brought back to life at home with a vacuum, a soft brush, the right upholstery cleaner, and patience. The winning sequence is vacuum first, pre-treat, clean in small sections, rinse, and dry completely. For heavily soiled seats or fabric labeled vacuum-only, a professional detailer is the safer call.