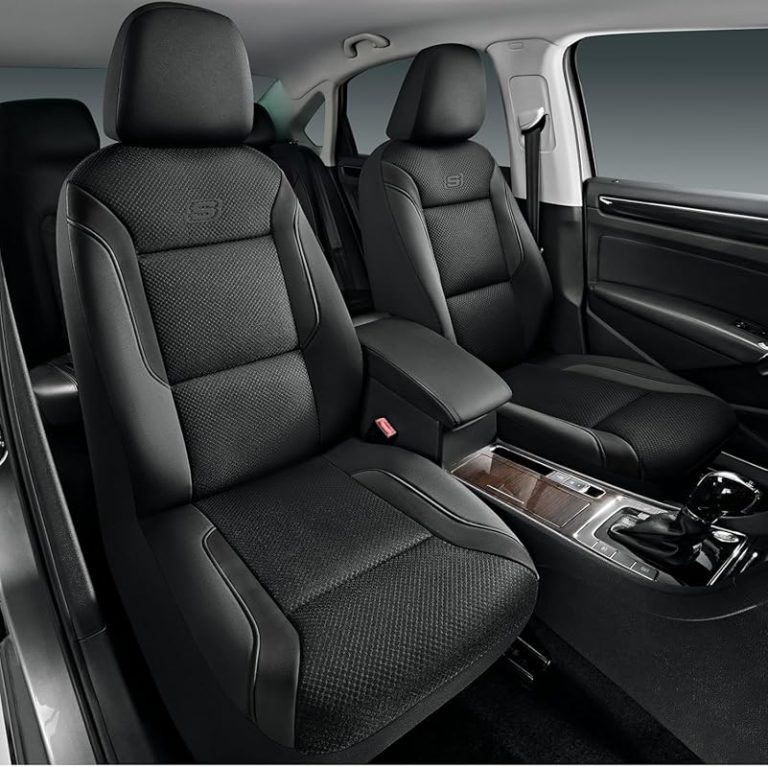
How to Install Leather Seat Covers: A Safe, Wrinkle-Free DIY Guide

To install leather seat covers, match each cover to the correct seat, remove the headrests when allowed, pull the covers into position, and secure every strap beneath the seat. Keep airbag seams, seat belts, controls, wiring, and child-seat anchors clear. Most careful DIY installs take about 30 to 90 minutes.
Leather seat covers should fit snugly without sliding, blocking seat controls, or covering side-airbag seams. Install the backrest first, add the bottom cushion cover, tighten the straps evenly, and check the fit again after several days of driving.
By Brandon Walker. Disclosure: As an Amazon Associate, I may earn from qualifying purchases made through links using Store ID [YOUR-STORE-ID-20].
I have installed seat covers in daily drivers, family SUVs, work trucks, and cars packed for long road trips. The job is not hard, but the small details matter.
A loose cover can bunch under your legs. A strap routed in the wrong place can rub against wiring. The wrong cover may also interfere with a seat-mounted airbag or passenger sensor.
In this guide, I will show you how to install leather seat covers without removing the seats. I will also explain fitment, heated seats, airbag safety, common problems, and care after installation.
For more cabin upgrades, visit our interior accessories guide.
What Are Leather Seat Covers?
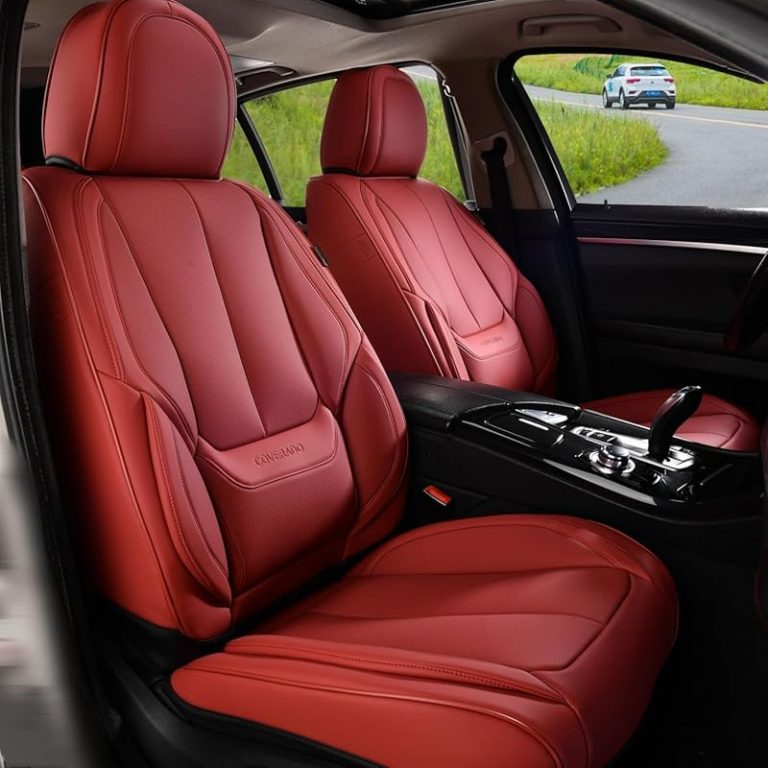
Leather seat covers are removable panels that fit over your vehicle’s original upholstery. They protect the seats from spills, dirt, pet hair, sunlight, and daily wear.
Some covers use genuine leather. Many affordable sets use synthetic leather, PU leather, vinyl, or leatherette. These materials can look similar, but they do not always stretch or breathe in the same way.
A full set may include front backrest covers, front cushion covers, rear bench pieces, headrest covers, hooks, buckles, straps, and small anchors. Vehicle-specific sets may also include openings for armrests, cupholders, split-folding seats, and child-seat anchors.
Universal Versus Vehicle-Specific Covers
Universal covers fit many vehicles. They cost less and are easy to find, but they may need more tucking and adjustment.
Vehicle-specific covers follow the shape of one make, model, year, and seat layout. They usually fit more tightly and leave better access to controls and seat features.
For a daily driver, I prefer a vehicle-specific or semi-custom cover with clearly marked side-airbag panels, separate headrest pieces, reinforced straps, and openings made for the original seat controls.
- Confirm the vehicle year, make, model, and trim.
- Check whether the front seats have side airbags.
- Look for heated-seat and ventilated-seat compatibility.
- Check for powered controls, lumbar knobs, and seat-mounted armrests.
- Confirm the rear-seat split, such as 60/40 or 40/20/40.
- Make sure seat belt buckles and child-seat anchors remain open.
- Check whether the headrests can be removed.
- Read the cover maker’s cleaning instructions.
How to Install Leather Seat Covers
Park on a flat surface and give yourself room to open every door. Work on one seat at a time so you do not mix up the covers, straps, or headrest pieces.
A plastic trim tool can help with gentle tucking. Avoid sharp screwdrivers, knives, and metal hooks near the upholstery, electrical connectors, or airbag seams. You can find other useful installation gear in our tools and garage gear guide.
Read the seat cover instructions and the seating section of your owner’s manual. Find the side-airbag labels, seat controls, headrest releases, belt buckles, and child-seat anchors before covering anything.
Lay the pieces on a clean surface. Match the driver-side and passenger-side covers. Look for labels such as left, right, backrest, cushion, rear bench, and airbag side.
Vacuum crumbs, sand, and pet hair from the seams. Wipe the seats with a product made for the original upholstery. Let the surface dry before installing the covers.
Move the seat forward or backward to reach the straps. Turn the vehicle off before placing your hands beneath a powered seat. Never move the seat while your fingers, tools, or straps are near the tracks.
Press the release button and lift the headrest straight up. Some vehicles have a second hidden release. Do not force it. Check the owner’s manual if the posts will not move.
Slide the cover over the top of the seatback. Pull it down a little at a time. Keep the main seam centered and place the marked airbag side on the outside edge of the seat.
Feed the flap between the backrest and bottom cushion. Pull it from behind the seat. Work slowly so the material does not fold, tear, or catch on a wire.
Center the front edge over the cushion. Pull the sides down evenly. Keep the seat belt buckle, recline handle, power switches, and storage pockets clear.
Pass the straps beneath the seat without crossing the tracks. Keep them away from yellow airbag connectors, electrical wires, motors, springs, sharp brackets, and moving parts.
Attach each fastener to the matching strap or a solid point approved by the cover maker. Do not hook a cover to wiring, a plastic connector, a seat spring, or a moving adjustment bar.
Switch between the left, right, front, and rear straps. Use light tension at first. Smooth the surface with your hands, then tighten again until the cover feels secure.
Use the cover’s factory-made openings when possible. Guide the posts through the correct holes and lock the headrest at a safe height. Do not cut new openings unless the manufacturer tells you to do so.
Move the seat through its full range. Test the recline, height, lumbar support, headrest, seat belt, heat, ventilation, and folding features. Stop if a strap pulls tight or enters a seat track.
Sit in the seat for a few minutes. Smooth any wrinkles toward the edges. Recheck the fit after several drives because new covers often settle and need one more adjustment.
Do not pull one strap as tight as possible before touching the others. Tighten the cover in small, even steps. This keeps the center seam straight and stops the bottom panel from twisting.
Why a Correct Installation Matters
A good seat cover does more than make the cabin look fresh. It stays in place when you enter, exit, brake, turn, and drive over rough roads.
Correct fit also keeps the seat belt buckle easy to reach. It leaves controls open and protects wires beneath powered seats.
Seat covers are not crash-protection devices. They do not replace seat belts, airbags, child restraints, or proper seating positions. The goal is to add protection without changing how the vehicle’s safety systems work.
For general vehicle safety information, review the NHTSA air bag guidance and the current instructions in your owner’s manual.
Installation Notes
On one long road-trip install, the covers looked tight in the driveway but settled after two days of driving. The driver-side cushion moved about an inch near the door. I centered it again, tightened both rear straps evenly, and it stayed put for the rest of the trip.
The lesson was simple: the first fit is not always the final fit. Foam compresses when you sit on it, and new synthetic leather relaxes as the cabin warms.
I now inspect a fresh installation after the first drive, after one week, and after the first deep cleaning.
Do’s and Don’ts for Leather Seat Cover Installation
- Match every cover to the correct seat.
- Keep the marked airbag side facing outward.
- Clean and dry the original upholstery first.
- Use even tension on all straps.
- Keep buckles, controls, and anchors open.
- Recheck the fit after several drives.
- Do not cover an airbag seam or label.
- Do not attach straps to electrical wiring.
- Do not run straps through seat tracks.
- Do not force a non-matching cover into place.
- Do not use sharp tools near the upholstery.
- Do not ignore an airbag warning light.
Leather Seat Cover Fitment Spec Sheet
Vehicle and Seat Compatibility
A cover that fits one trim may not fit another trim of the same vehicle. Sport seats, integrated headrests, seat-mounted armrests, split rear benches, side airbags, powered controls, heated seats, and ventilated seats can all change fitment.
Check the full vehicle description before buying. Do not rely only on the model name. A 60/40 rear bench needs a different cover layout than a one-piece bench.
Front bucket seats with separate headrests are often the easiest to cover. Seats with built-in headrests or shoulder-mounted belts usually need a vehicle-specific design.
You can also use the NHTSA recall lookup to check for open safety recalls linked to your vehicle identification number.
Heated and Ventilated Seats
Use covers that the manufacturer lists as compatible with heated seats. Thick padding may slow heat transfer.
For ventilated seats, choose a perforated design made for airflow. A solid cover may greatly reduce the cooling effect.
Side-Airbag Seats
Many modern front seats contain side airbags in the outer side of the backrest. Airbag-compatible covers often use a special seam that can open during deployment.
The airbag side must face the correct door. Never turn a left cover around to fit a right seat.
Leather Seat Cover Budget Estimate
Prices vary by material, vehicle, seat layout, and the number of rows. Genuine leather and detailed custom stitching can cost much more than universal synthetic leather.
Install Tips for a Tighter, Cleaner Fit
- Install the covers in a warm cabin so the material is more flexible.
- Start with loose straps and tighten them in stages.
- Keep the main stitching lined up with the center of the seat.
- Push wrinkles toward the edges instead of trapping them in the middle.
- Use a flashlight before routing anything beneath the seat.
- Place extra strap length where it cannot enter a track or motor.
- Check that rear-seat latches still lock after covering a folding bench.
- Retighten the covers after three to seven days of use.
- Remove trapped sand quickly because it can rub against the original seat.
- Use only cleaners approved for the cover’s actual material.
For cleaning tools and safe interior-care methods, see our car care guide.
Important Technical Details
Some passenger seats use an occupant classification sensor inside the cushion. Other seats contain heating mats, ventilation fans, position sensors, and airbag wiring. Do not place hard objects, thick foam pads, or tightly crossed straps where they may affect these parts.
If the passenger-airbag status display changes after installation, remove the cover and check the vehicle and cover instructions. Do not guess when an airbag system acts differently than it did before.
For wider safety research, Consumer Reports maintains a useful car safety information section.
Safety Warnings Before You Drive
Never use a seat cover that blocks a side-airbag seam, seat belt buckle, integrated belt path, child-seat anchor, seat control, sensor, or moving track. Stop using the cover if an airbag warning light appears or if any seat function becomes restricted.
Do not remove a front seat or unplug a yellow airbag connector just to fit a cover. Seat removal may require special procedures, torque values, diagnostic checks, and battery-disconnection steps.
If the cover cannot be installed without disturbing seat wiring, ask a qualified technician for help. The AAA auto repair network can help drivers locate repair facilities in the United States.
Many vehicles place a torso-protecting side airbag inside the outer edge of the front seatback. That is why airbag-compatible covers have special seams and must be installed on the correct side.
Final Installation Check
- The cover should feel tight and stay centered when you enter or exit.
- All seat belts, controls, tracks, anchors, and folding parts must remain usable.
- Airbag-compatible panels must face the correct side of the vehicle.
- Straps must stay clear of wires, motors, springs, and sharp brackets.
- The fit should be checked again after the material settles.
Learning how to install leather seat covers is mainly about patience and correct fitment. Work one seat at a time, align the covers before tightening, route every strap safely, and never trade airbag or seat-belt access for a smoother look.
Leather Seat Cover Types Compared
| Cover Type | Best Use | Typical Install Time | What to Expect |
|---|---|---|---|
| Universal | Budget upgrades and simple bucket seats | 30–60 minutes | Low cost, but may need extra tucking and regular adjustment |
| Semi-custom | Daily drivers needing a closer fit | 45–90 minutes | Better shaping with some vehicle-specific features |
| Vehicle-specific | Modern seats with controls, airbags, or split benches | 60–120 minutes | Cleaner fit and better access when ordered correctly |
| Genuine leather custom set | Premium interiors and long-term ownership | 90 minutes or more | Higher cost, detailed fit, and material-specific care |
Common Installation Problems and Fixes
| Problem | Likely Cause | Practical Fix |
|---|---|---|
| Cover slides forward | Rear straps are loose or uneven | Center the cover and tighten both rear straps in small steps |
| Wrinkles stay in the center | The sides were tightened before the top and bottom were aligned | Loosen the straps, smooth outward, and retighten evenly |
| Seat belt buckle is hard to reach | The cushion cover is covering the buckle opening | Reposition the cover and pull the buckle fully through its opening |
| Seat will not slide fully | A strap or hook is entering the seat track | Stop moving the seat and reroute the fastener away from the track |
| Heat or ventilation feels weak | The cover is too thick or not made for the seat feature | Use a thinner compatible cover or a perforated design |
| Airbag warning light appears | A sensor, connector, or seat system may be affected | Stop using the cover and have the system checked by a qualified technician |
| Headrest cover will not line up | The piece is reversed or belongs to another seat | Check the labels and compare the post spacing before forcing it |
Frequently Asked Questions
Most front-seat installations take about 30 to 90 minutes. Custom covers, rear benches, armrests, and split-folding seats may take longer.
Yes. Most seat covers are designed to install with the seats inside the vehicle. You normally move the seat forward and backward to reach the straps.
They can be safe only when the cover is listed as airbag compatible and installed on the correct side. Never cover or alter the marked airbag seam.
Use only covers approved for those features. Thick covers can slow seat heating, while solid material can reduce airflow from ventilated seats.
Warm the cabin naturally, smooth the material toward the edges, and tighten each strap a little at a time. Recheck the fit after several drives.
A clean, dry, well-fitted cover should not damage the seat. Trapped sand, moisture, loose hooks, and constant sliding can cause wear over time.
Check them after the first few drives, again after one week, and during regular interior cleaning. Tighten them whenever the cushion starts to move.
Conclusion
Installing leather seat covers is a solid weekend project for most car owners. The key is not speed. The key is making sure every piece fits the correct seat and every safety feature stays clear.
I recommend buying a cover made for your vehicle whenever the seats have side airbags, powered controls, heating, ventilation, or a complex rear bench. The closer fit usually saves time and reduces slipping.
Clean the seats first, install the backrest before the cushion, and tighten the straps evenly. Then test the seat through its full range before driving.
After a few days, check the fit one more time. That final adjustment is often what turns an average installation into a clean, secure, road-trip-ready result.