How to Clean Piano Black Interior Trim Without Scratches

how to clean piano black car interior trim is easiest to judge by fit, material, installation or application needs, care requirements, compatibility, and value for your vehicle.
Learning how to clean piano black car interior trim is one of the most frustrating parts of car ownership. The glossy surfaces look stunning in the showroom but seem to collect scratches just from a glance. The good news is that with the right technique and products, you can keep that mirror-like finish looking new without spending a fortune at a professional detailer.
- Confirm fit: Check vehicle, trim, dimensions, surfaces, and safety-system compatibility.
- Check materials: Match construction or chemicals to the intended seat, floor, trim, paint, glass, or device.
- Plan setup: Follow manufacturer instructions and keep airbags, controls, sensors, vents, pedals, and moving parts clear.
- Plan upkeep: Compare cleaning, maintenance, durability, warranty, and replacement needs.
Why Piano Black Trim Scratches So Easily (and What You’re Doing Wrong)
Piano black trim is essentially glossy black plastic or lacquered composite. Unlike matte or textured plastics, there’s no texture to hide imperfections — every tiny scratch, swirl mark, and dust particle shows up immediately against the dark reflective surface.
The biggest mistake most owners make is using the same towel and cleaner they use on the rest of the interior. Regular terry cloth towels, paper towels, and even some microfiber towels that have picked up grit from previous uses can act like sandpaper on the delicate clear coat of piano black trim.
Another common error is wiping the trim while it’s dry or dusty. When you wipe a dusty surface, you’re dragging abrasive particles across the finish. This is why so many cars develop those telltale spider-web swirl marks on the center console within the first year of ownership.
Treat piano black trim the same way you would treat a pair of eyeglasses or a camera lens. Never wipe it without first removing loose dust and grit, and always use a fresh, clean microfiber towel designated only for interior surfaces.
The Step-by-Step Method for Scratch-Free Cleaning
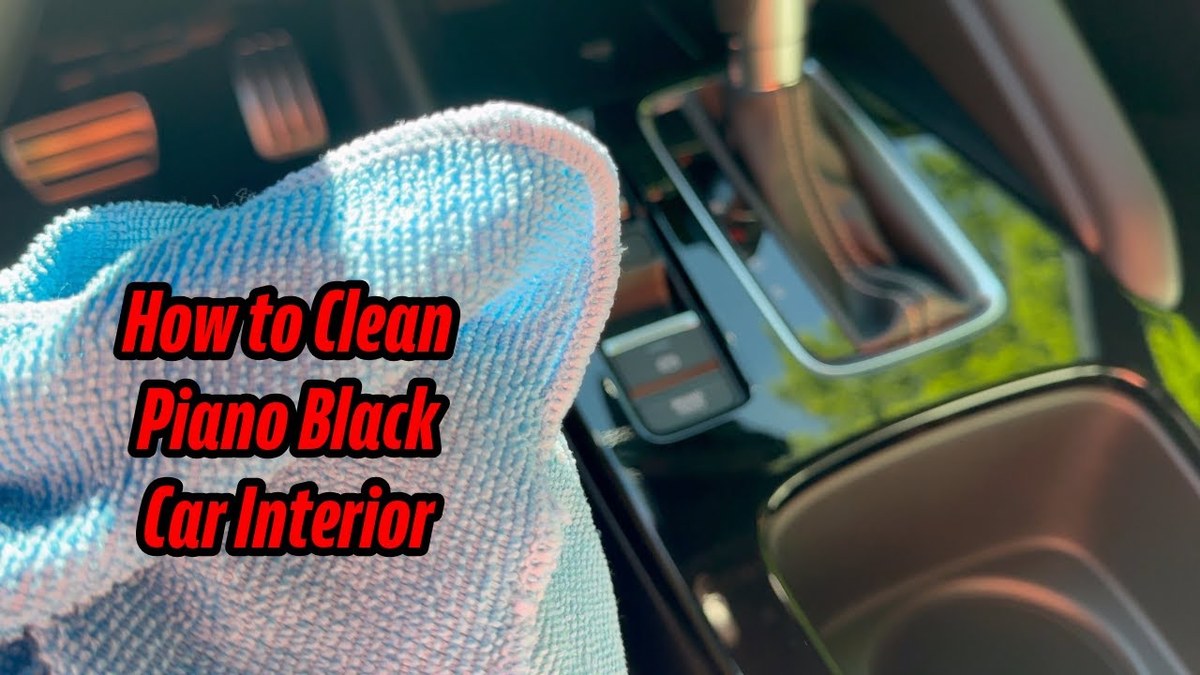
Cleaning piano black trim safely comes down to three things: removing grit before you touch the surface, using the right cleaner, and wiping with a technique that doesn’t trap abrasive particles against the finish.
Step 1: Dry Dusting and Grit Removal
Before any liquid touches the trim, you need to remove loose dust and debris. A soft-bristled detailing brush or a clean microfiber towel folded into a small pad works well for this. Some detailers recommend a compressed air blower or a soft makeup brush for tight crevices around buttons and vents.
Work from the top of the trim piece downward so gravity helps carry dust away from the surface. If the trim is particularly dusty, consider using a damp microfiber towel to gently lift the dust rather than wiping it around.
Step 2: Choosing the Right Cleaner and Dwell Time
Not all interior cleaners are safe for piano black surfaces. Many all-purpose cleaners contain harsh solvents or abrasives that can dull the clear coat or leave behind a hazy residue. Look for a pH-neutral interior cleaner or a dedicated plastic-safe cleaner that explicitly states it’s safe for glossy or high-gloss surfaces.
Spray the cleaner onto a microfiber towel rather than directly onto the trim. This prevents liquid from seeping into seams, around buttons, or behind the trim panel where it could damage electronics. Allow the cleaner to dwell for the recommended time on the label — usually 10 to 30 seconds — so it can break down oils and fingerprints without requiring aggressive scrubbing.
Step 3: Wiping Technique and Residue Inspection
Use a folded microfiber towel and wipe in one direction — typically front to back or left to right — rather than in circular motions. Circular motions are more likely to leave visible swirl marks. Apply light, even pressure and let the cleaner do the work.
After the initial wipe, flip the towel to a clean side and buff the surface dry. Inspect the trim under direct light to check for streaks or residue. If you see any, wipe again with a lightly dampened microfiber towel and buff dry with a fresh section of the towel.
Remove loose grit with a soft brush or compressed air before touching the trim.
Spray a pH-neutral interior cleaner onto a plush microfiber towel, not directly on the trim.
Use light pressure and one-directional strokes, then buff dry with a clean section of the towel.
- Use a fresh, clean microfiber towel
- Remove dust and grit before wiping
- Spray cleaner onto the towel, not the trim
- Wipe in straight lines with light pressure
- Use paper towels or terry cloth
- Wipe dry dusty surfaces
- Use all-purpose cleaners with harsh solvents
- Scrub aggressively or use circular motions
Best Products for Piano Black Trim in 2026 (and What to Avoid)
While specific product recommendations change as new formulas hit the market, the categories of products that are safe for piano black trim remain consistent. What matters more than the brand is the formulation and how you apply it.
Cleaners That Are Safe for Piano Black Surfaces
Look for water-based, pH-neutral interior cleaners that are free of silicone, ammonia, and alcohol. These ingredients can cause discoloration, hazing, or premature cracking of the clear coat over time. Products labeled as “safe for glossy surfaces,” “no-residue,” or “plastic-safe” are your best starting point.
Diluted isopropyl alcohol mixed with water (around a 10% to 15% solution) can work as a light degreaser for stubborn fingerprints, but it should be used sparingly and followed by a clean damp wipe. Avoid alcohol-based glass cleaners, which can strip protective coatings and dry out the plastic.
Tools, Towels, and Applicators That Prevent Micro-Scratches
Not all microfiber towels are created equal. For piano black trim, you want a plush, non-abrasive microfiber towel with a high GSM (grams per square meter) — typically 300 GSM or higher. The edge should be satin-stitched or seamless to prevent the stitching from dragging across the surface.
Soft foam applicator pads are useful for applying protectants or polishes. Avoid any applicator with visible texture or roughness. A soft detailing brush with natural or synthetic bristles can help dislodge dust from tight corners, but it should be used gently and kept clean.
Ventilation and Safety When Using Chemical Cleaners
Even mild interior cleaners can produce fumes that are irritating in a closed cabin. Open the doors or windows while cleaning, and avoid spraying products near vents, touchscreens, or electronic controls. If you’re using a polish or compound to remove scratches, follow the manufacturer’s ventilation recommendations and wear gloves if the label advises it.
Never mix different cleaning chemicals. Combining ammonia-based glass cleaner with bleach or certain other household products can produce hazardous fumes. Stick to one product at a time and follow the label instructions.
How to Remove Existing Scratches and Swirl Marks

If your piano black trim is already covered in fine scratches, the right approach depends on how deep they are. Light surface scratches can often be removed with a gentle polish, while deeper scratches may require more aggressive correction — or replacement of the trim piece.
Hand Polishing vs. Machine Polishing
For light swirl marks, hand polishing with a soft foam pad and a fine-grade plastic polish or compound can work well. Apply a small amount of polish to the pad, work it into the surface using straight-line motions, and buff off with a clean microfiber towel. This method gives you maximum control and is the safest option for beginners.
Machine polishing with a dual-action polisher can achieve better results on heavily swirled trim, but it carries a higher risk of burning through the thin clear coat on piano black plastic. If you go this route, use a low speed, a soft foam pad, and work in small sections. Practice on a hidden area first to gauge how much material the polish removes.
Piano black trim has a thin clear coat that is much softer than automotive paint. Aggressive compounds or high-speed machine polishing can burn through the clear coat in seconds, leaving a dull, milky spot that is very difficult to repair without replacing the trim piece.
Scratch Removal Kits: What They Can and Can’t Fix
Several brands sell scratch removal kits specifically for plastic trim and headlight lenses. These kits typically include a series of polishing compounds with progressively finer abrasives, along with foam pads or applicators. They can be effective for light to moderate scratches, but they won’t fix deep gouges, cracks, or scratches that have gone all the way through the clear coat into the colored plastic below.
Before investing in a kit, test it on a small, inconspicuous area of the trim. Some kits require multiple passes and can take 30 to 60 minutes per trim piece. If the scratch is deep enough to catch a fingernail, no amount of polishing will remove it — you’d need to fill it or replace the trim panel.
Protecting Piano Black Trim After Cleaning
Once the trim is clean and free of scratches, the next step is protecting it so you don’t have to repeat the process every week. There are two main approaches: sacrificial coatings like sealants and waxes, and more permanent solutions like ceramic coatings and paint protection film.
Ceramic Coatings and Sealants: Application and Cure Time
Ceramic coatings designed for interior trim create a hard, hydrophobic layer that repels dust, fingerprints, and light abrasion. They’re applied similarly to paint coatings — the surface must be perfectly clean and dry, and the coating needs to cure for a specified period before the trim can be touched. Cure times vary by product, but most interior-specific coatings recommend 12 to 24 hours of curing.
Sealants and trim protectants are easier to apply and cure faster, but they don’t last as long. Some sealants use a spray-on, wipe-off application that takes just a few minutes and provides several weeks of protection. For most owners, a sealant is the more practical choice; ceramic coatings are worth considering if you want maximum durability and don’t mind the careful prep work.
If you’re considering a ceramic coating for your interior trim, it’s worth understanding how the coating behaves on plastic surfaces. Our guide to washing a car with ceramic coating explains the maintenance side of coated surfaces, and the article on how long ceramic coating lasts covers realistic durability expectations. If you ever need to remove an old or failing coating, our guide to removing ceramic coating explains the process.
Paint Protection Film (PPF) for Interior Trim
Paint protection film is a transparent polyurethane film that can be applied directly to piano black trim to absorb scratches before they reach the plastic. Many manufacturers now offer PPF kits cut specifically for the center console, door panels, and climate control surrounds of popular car models.
PPF is the only protection option that genuinely prevents scratches from occurring, rather than just making them less visible. The trade-off is cost and installation complexity. Pre-cut kits range from about $30 to $150 depending on the vehicle, and professional installation adds another $100 to $300. Some owners find the film’s texture or edge visibility distracting, so it’s worth seeing it in person before committing.
Maintenance Routine to Keep Trim Looking New
Consistency beats intensity when it comes to piano black trim. A few minutes of preventive care every week will keep the surface looking better than an aggressive cleaning session once a month.
Daily and Weekly Habits That Prevent Damage
Keep a dedicated microfiber towel in your car’s door pocket or glovebox for quick dusting. When you notice dust or fingerprints, use the towel with a light touch — no cleaner needed for light dust. For fingerprints or smudges, use a damp microfiber towel followed by a dry one.
Avoid resting phones, keys, or other objects on the center console. These items carry abrasive particles that will eventually scratch the trim. If you must place something on the console, use a soft cloth or a felt pad underneath. Also, be mindful of zippers, belt buckles, and rings when reaching across the center console — they can easily drag across the trim and leave deep scratches.
Microfiber Towel Care and Storage
Microfiber towels need to be washed before their first use and regularly after that. Wash them separately from cotton towels and clothing to prevent lint transfer and cross-contamination of grit. Use a liquid detergent without fabric softener, and skip the dryer sheets — they coat the fibers and reduce the towel’s ability to pick up dust.
Air drying is gentler on microfiber than a tumble dryer, but if you use a dryer, set it to low heat. Store clean towels in a sealed container or a dedicated drawer to keep them free of dust and debris. A dirty or gritty microfiber towel will scratch piano black trim faster than almost anything else.
DIY vs. Professional Detailing: When to Call a Pro
Most piano black trim maintenance is well within the reach of a careful DIYer. The cleaning method above is simple, and hand polishing light scratches is a manageable weekend project. But there are situations where professional help is worth the money.
When Professional Correction Is Worth the Cost
If your trim has deep scratches, haze from improper cleaning, or damage from a product that was left on too long, a professional detailer has the tools and experience to correct it. Machine polishing piano black trim requires a steady hand and a good understanding of how much clear coat you can safely remove. A professional can also apply PPF with precision, which is extremely difficult to do well in tight corners and around curved surfaces.
Professional correction for a single trim piece typically runs between $50 and $150, depending on the severity of the damage and the shop’s rates. For heavily damaged trim on a high-end or rare vehicle, professional restoration is often more cost-effective than replacing the factory panel.
Safety Limitations and Warranty Considerations
Before attempting any aggressive polishing, check your vehicle’s warranty. Some manufacturers consider trim damage from improper cleaning or polishing to be a maintenance issue, not a defect, and may deny warranty claims on those panels. If your car is leased, modifying the trim with PPF or a ceramic coating could also affect the lease return terms.
Also, be aware that some trims have additional treatments like soft-touch coatings or anti-glare layers that can be damaged by polishing. If you’re unsure what type of coating your trim has, test a hidden area first or consult your owner’s manual.
- Best use case: Regular maintenance with a microfiber towel and pH-neutral cleaner keeps piano black trim looking new
- Main strength: The straight-line, grit-first method prevents new scratches while removing dust and fingerprints
- Main limitation: Deep scratches and gouges cannot be fixed by cleaning or polishing alone
- Next verification step: Test any new cleaner or polish on a hidden area of the trim before full application
Keeping piano black interior trim scratch-free is less about buying expensive products and more about developing careful habits. Remove dust before wiping, use the right towels, and protect the surface after cleaning. With the approach outlined here, you can keep that glossy center console looking showroom-fresh for years.