Ceramic Coating Wheels Cost: Full Price Breakdown & Value Guide

DIY wheel ceramic coating kits typically run $30–$80, while professional coating for a set of four wheels usually costs $150–$600. Your final price depends on wheel size, condition, prep work, and shop rates.
The real ceramic coating wheels cost depends on whether you do it yourself or hire a professional, with typical ranges spanning roughly $30–$80 for a DIY kit and $150–$600 for a professional job on a set of four wheels. This guide breaks down what drives those numbers, what you actually get for the money, and which route makes sense for your driving habits and budget.
- DIY range: A consumer wheel coating kit costs $30–$80, plus roughly $35–$70 in prep supplies for.
- Pro range: Professional wheel coating for four wheels typically runs $150–$600, with labor and decontamination driving.
- Prep matters: Heavily contaminated or neglected wheels cost more to coat because iron decontamination, claying, and.
- Heat and SiO2: Higher SiO2 content generally means better heat resistance and longer durability, but also a.
- Maintenance: Use pH-neutral cleaners and soft brushes only; acidic wheel cleaners and aggressive brushes can.
What Does Ceramic Coating Wheels Cost in 2026?
Wheel coating pricing has stayed relatively stable because the real cost drivers haven’t changed: labor, surface preparation, and coating quality. You have two basic paths, and each comes with a very different price tag.
DIY Wheel Ceramic Coating Cost Range
Consumer-grade wheel coating kits typically run between $30 and $80. Most include a bottle of coating, foam applicators, microfiber towels, and gloves — enough product for at least one set of four wheels, often more. The catch is that the kit alone isn’t the whole cost. You’ll also need prep supplies like an iron remover, a dedicated wheel cleaner, and clean towels if you don’t already own them.
Professional Wheel Ceramic Coating Cost Range
Professional wheel coating usually lands between $150 and $600 for a set of four wheels, depending on your market and the shop’s reputation. That price includes labor, a thorough decontamination process, and often a written warranty. For a closer look at how shops build their quotes, see our guide on how much to ceramic coat wheels.
Why Ceramic Coat Your Wheels? The Real Value Beyond Aesthetics
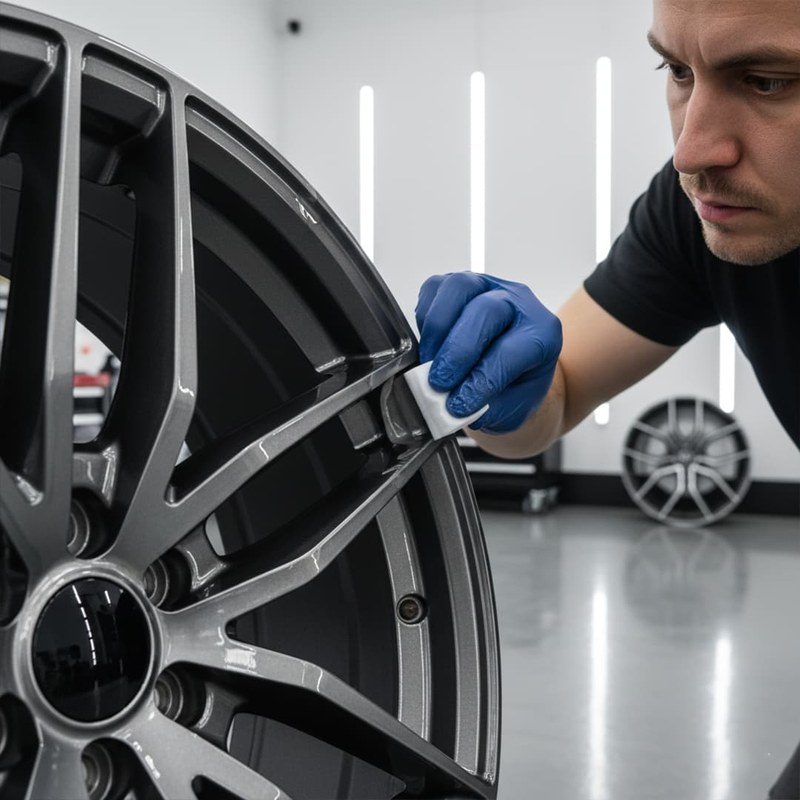
Before you decide whether the price is worth it, it helps to understand what the coating actually does. The value isn’t just a deeper shine — it’s about how the wheels behave day to day.
Brake Dust and Contaminant Protection
Brake dust is made up of iron particles, carbon, and adhesive residues that can bake onto wheel surfaces under heat. Over time, that buildup can etch into clear coat or bare metal finishes. A ceramic coating creates a slick, semi-permanent barrier that brake dust can’t bond to as aggressively, which makes it far easier to rinse away during a normal wash.
Cleaning Time and Effort Savings
Coated wheels clean noticeably faster. A strong stream of water removes most loose dust, and a pH-neutral soap plus a soft brush handles the rest. Many owners report that weekly wheel cleaning drops from a 20-minute scrubbing session to a quick rinse-and-wipe job. That time adds up quickly if you commute in stop-and-go traffic or drive in an area with heavy brake dust.
Appearance, Gloss, and Wheel Condition
Ceramic coatings add depth and gloss to painted, clear-coated, and even bare polished wheels. They also provide UV protection that can slow fading and clear-coat yellowing. That matters if you plan to keep the car for years or want to preserve wheel condition for resale.
DIY vs. Professional Wheel Ceramic Coating: Cost Breakdown
The gap between DIY and professional pricing comes down to one thing: labor and preparation. Here’s what each route actually costs when you add up all the pieces.
- Lower upfront cost — coating kits start around $30
- Leftover product covers future wheels or a second vehicle
- You control the prep and application quality
- Prep work is time-consuming and physically demanding
- Application errors can cause high spots or streaks
- No warranty if the coating fails
DIY Costs: Coating, Prep Products, and Applicator Kits
A realistic first-time DIY budget includes a $30–$80 coating kit, $15–$30 for an iron-removing wheel cleaner, $10–$20 for a dedicated wheel shampoo, and $10–$20 for quality microfiber towels. That puts the true first-time cost at roughly $65–$150. On later applications, you’ll only need to replace the coating and towels, which drops the cost significantly.
Professional Costs: Labor, Decontamination, and Warranty
Professional pricing is mostly labor. A reputable installer washes the wheels, chemically decontaminates them, clays or polishes as needed, wipes down with a panel prep solution, and applies the coating in controlled conditions. That process takes several hours, which is why labor makes up the bulk of the $150–$600 price. In exchange, you get an experienced application and, in many cases, a warranty that covers premature failure.
Key Factors That Change the Price of Wheel Ceramic Coating
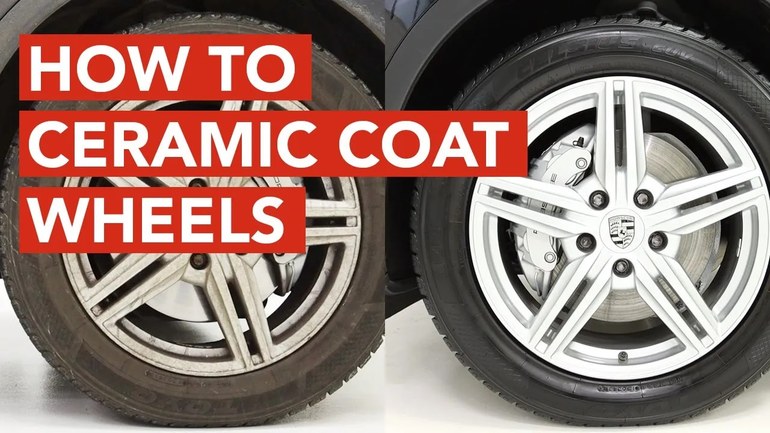
No two quotes look exactly alike because several variables move the final number. Here’s what shops and DIY budgets are actually responding to.
Wheel Size, Count, and Current Condition
Larger wheels mean more surface area and more product usage. A set of 19- or 20-inch wheels will typically cost more than a set of 16- or 17-inch wheels. Condition matters even more: heavily contaminated, pitted, or previously neglected wheels require extra decontamination and polishing time before the coating can bond properly.
Coating Chemistry and SiO2 Content
SiO2, or silicon dioxide, is the main film-forming ingredient in most ceramic coatings. Higher SiO2 content generally translates to longer durability and better heat resistance — and a higher price. Consumer coatings often contain lower SiO2 percentages, while pro-grade products push higher concentrations for multi-year protection. Always check the manufacturer’s stated durability and heat ratings before comparing prices.
Surface Preparation and Decontamination Needs
This is the biggest hidden cost in any wheel coating job. If brake dust has been baking into the wheels for years, the installer has to spend more time removing it. Chemical decontamination, claying, and polishing all add labor. A well-maintained set of wheels will always be cheaper to coat than a neglected one.
Shop Location, Reputation, and Market Rates
Detailing rates vary by city and region. Shops in high-cost metro areas typically charge more than rural or suburban detailers. Reputation also plays a role — established shops with strong portfolios and certifications can command a premium, and that premium often comes with better prep standards and warranty support.
When comparing professional quotes, ask for an itemized breakdown of prep, coating product, and labor. A shop that skips the decontamination step to offer a low price is usually a shop to avoid.
Best DIY Wheel Ceramic Coatings: Product Evaluation and Costs
If you’re leaning toward DIY, the product you choose matters as much as your technique. Here’s how to evaluate options before spending money.
Evaluation Criteria: Durability, Heat Resistance, and Ease of Use
Wheels get hot under braking, so heat resistance is a key spec to check. Look for coatings that state their heat tolerance and expected durability on wheel surfaces. Ease of use is equally important: most consumer wheel coatings use a simple wipe-on, wipe-off application, while prosumer products may require more precise leveling and faster removal.
Consumer vs. Prosumer Coating Tiers and Price Points
Consumer-tier wheel coatings typically cost $30–$50 and are formulated for easy application with durability measured in months. Prosumer-tier products run $50–$100 and usually offer longer protection, higher SiO2 content, and better heat resistance. The right tier depends on how much time you’re willing to invest and how long you want the protection to last.
Application, Dwell Time, and Cure Time Considerations
Most wheel coatings require a short dwell time of one to five minutes before buffing, followed by a cure period before the wheels get wet or see heavy use. Cure times vary by product, but many recommend 12–24 hours of dry time. If you only have one vehicle, plan the application so the car can sit overnight. For more detail, read about how long ceramic coating takes to cure.
- Confirm the coating is compatible with your wheel finish — painted, clear-coated, polished, or matte
- Check the stated heat and durability ratings against your driving conditions
- Make sure the cure time fits your schedule and available garage space
- Budget for prep products, not just the coating bottle
- Read the full application instructions before opening the bottle
Professional Wheel Ceramic Coating: What You’re Paying For
Professional pricing isn’t just about the coating product — it’s about the process and the accountability that comes with it.
The Multi-Step Preparation and Decontamination Process
A proper professional job starts with a dedicated wheel wash, followed by an iron-removing chemical decontamination to dissolve embedded brake dust. Many installers also clay the surface and, if needed, lightly polish to remove etching before applying the coating. Some shops remove the wheels entirely to coat the inner barrels and behind the spokes, which adds labor but provides complete coverage.
Application Technique, Curing, and Warranty Coverage
Professional application involves careful panel-by-panel work, proper leveling, and controlled curing conditions. Installers also document the job and provide aftercare instructions. Warranty coverage varies by shop and product, so ask exactly what’s covered, for how long, and what maintenance the warranty requires.
Choosing a Qualified Installer and Avoiding Overpaying
Look for a shop with a portfolio of wheel coating work, verifiable reviews, and clear answers about prep and warranty. Be wary of quotes that seem too good to be true — they often mean the prep is being skipped. At the same time, the most expensive shop isn’t automatically the best. Compare itemized quotes and ask what maintenance steps are required to keep the warranty valid.
Iron-removing wheel cleaners and panel prep sprays contain chemicals that can irritate skin and eyes. Always work in a well-ventilated area, wear gloves and eye protection, and follow the manufacturer’s instructions for both the prep products and the coating itself.
Ceramic Coating vs. Wax, Sealant, and Spray Coatings for Wheels
Ceramic coating isn’t the only way to protect wheels. Here’s how it compares to the cheaper alternatives.
| Option | Typical Protection | Best For |
|---|---|---|
| Car wax | Weeks | Budget-minded owners who don’t mind frequent reapplication |
| Synthetic sealant | 1–3 months | Moderate protection with low effort |
| Spray coating | 3–6 months | Quick refresh between full coatings |
| Ceramic coating | 1–3+ years | Long-term protection and easier cleaning |
Durability and Heat Resistance Compared
Car wax breaks down quickly under brake heat and typically lasts only a few weeks on wheels. Synthetic sealants do better, holding up for a couple of months. Spray coatings offer several months of protection with minimal effort. Ceramic coatings are the clear durability winner, with many products rated for one to three years or more on wheel surfaces.
Cost Per Month of Protection
Wax is cheap upfront but requires frequent reapplication, which makes its cost per month higher than it appears. Sealants and spray coatings sit in the middle. A $50 ceramic coating that lasts 12 months works out to roughly $4 per month — and that doesn’t account for the cleaning time it saves. Over a full year, the value math often favors ceramic coating.
Matching the Option to Your Driving Routine and Budget
If you drive a daily commuter with constant brake dust, ceramic coating makes sense. If you have a weekend car that sees light use and lives in a garage, a sealant or spray coating may be all you need. Match the protection level to the abuse the wheels actually take.
Maintaining Ceramic-Coated Wheels: Cleaning and Care Guide
A ceramic coating isn’t maintenance-free, but it does make maintenance easier. How you wash matters.
Safe Wash Methods and pH-Neutral Products
Use a pH-neutral wheel cleaner or car shampoo and a soft brush or microfiber mitt. Rinse thoroughly before touching the surface to remove loose grit. For a full washing routine, check our guide on how to wash a car with ceramic coating.
Common Mistakes That Damage Coatings
Avoid acidic wheel cleaners, which can degrade the coating over time. Skip automated car washes with aggressive brushes, and don’t let brake dust sit for weeks — the coating makes dust easier to remove, but it doesn’t make it immune to buildup.
How to Extend Coating Lifespan and Gloss
Wash wheels regularly, ideally every one to two weeks. A spray-on ceramic topper can refresh the hydrophobic layer between full coatings. Address any contamination early before it has time to bond, and avoid harsh chemicals that can strip the coating.
- Use pH-neutral products and soft brushes
- Rinse wheels before touching them
- Reapply a spray topper every few months
- Use acidic wheel cleaners or harsh abrasives
- Let brake dust sit for weeks on end
- Pressure-wash the coating at point-blank range
Is Ceramic Coating Wheels Worth the Cost? A Transparent Verdict
The honest answer depends on your car, your habits, and your tolerance for cleaning.
Ideal Users and Vehicle Fit
Ceramic wheel coating is best for owners of newer or well-maintained wheels who plan to keep the vehicle for more than a year, drive in conditions that generate heavy brake dust, or simply hate scrubbing wheels. It’s also a smart add-on if you’re already having the car’s paint coated, since the wheels can often be done in the same session.
Drawbacks, Limitations, and Safety Considerations
The upfront cost is the biggest drawback, especially with professional installation. Coatings also aren’t scratch-proof — they protect against contaminants and make cleaning easier, but they won’t prevent curb rash or physical damage. Harsh chemicals and improper washing can shorten their lifespan. If you’re weighing the broader trade-offs, our breakdown of whether ceramic coating is worth it covers the full picture.
Final Verdict: When to DIY, When to Go Pro, and When to Skip
Go DIY if your wheels are in good condition, you have a covered place to work, and you’re willing to spend a few hours on prep and application. Go professional if your wheels are heavily contaminated, you want a warranty, or you’d rather pay someone else to do the work correctly the first time. Skip it entirely if you plan to sell the car soon, if your wheels are already badly damaged, or if you simply don’t care about brake dust buildup.
Ceramic coating wheels cost $30–$80 for a DIY kit or $150–$600 for professional installation, and both routes deliver easier cleaning and longer-lasting protection than wax or sealants. Choose DIY for the best value on clean wheels, choose professional for the prep work and warranty, and skip the coating if you’re not going to maintain it.