Paint Correction and Ceramic Coating: The Complete Guide for Car Owners in the USA
Paint correction removes swirl marks, scratches, and oxidation from your car’s surface. Ceramic coating then locks in that fresh finish with a durable, hydrophobic shield. Together, they are the most effective one-two combo for protecting your car’s paint long-term — but the order and prep work matter a lot.
If you want your car to look showroom-new and stay that way for years, paint correction followed by ceramic coating is the gold standard. This guide walks you through what each process does, how they work together, what it costs, and how to do it right.
I’ll be honest with you — the first time I saw a paint-corrected car sitting under a ceramic coat, I thought it had been wrapped or repainted. The finish was that clean. I’m Brandon Walker, and I’ve spent years testing car care products on everything from daily drivers to weekend project cars. This guide is everything I wish someone had told me before I spent money on the wrong products in the wrong order.
What Is Paint Correction?
Paint correction is the process of removing defects from your car’s clear coat. That means swirl marks, light scratches, water spots, oxidation, and buffer trails. All of those dull, hazy, or scratchy-looking marks you see on older paint — paint correction removes them.
It is done using machine polishers, cutting compounds, and polishing pads. A detailer works the surface in stages, starting with a heavier cut to remove the defects, then finishing with a fine polish to restore gloss.
Paint correction works by safely removing a thin layer of clear coat to level the surface. Most cars have 100–200 microns of clear coat. A proper correction pass removes only 2–5 microns — so the paint is not thinned dangerously unless done excessively or with poor technique.
There are three common correction levels:
| Correction Level | What It Fixes | Typical Time | Best For |
|---|---|---|---|
| One-step polish | Light swirls, minor water spots | 2–4 hours | Newer cars with light defects |
| Two-step correction | Moderate scratches, oxidation, buffer trails | 6–10 hours | Most daily drivers 3–8 years old |
| Full multi-stage correction | Deep scratches, heavy oxidation, severe swirling | 12–20+ hours | Neglected or older vehicles, show cars |
What Is Ceramic Coating?
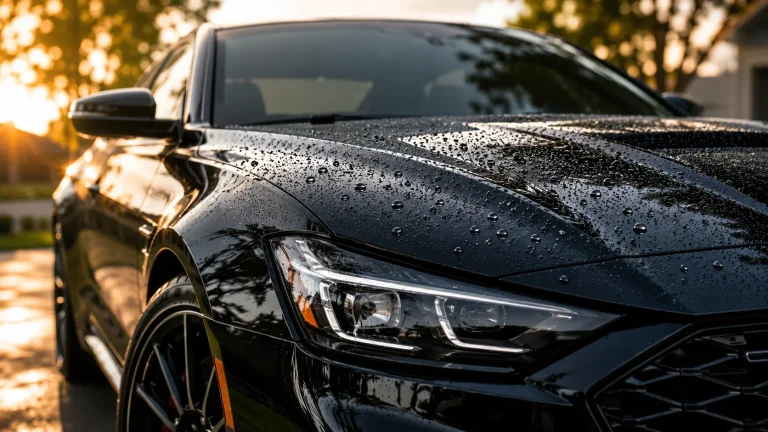
Ceramic coating is a liquid polymer that bonds chemically to your car’s paint. Once cured, it forms a hard, transparent layer that protects the surface from UV rays, road chemicals, bird droppings, and water. It also makes the paint hydrophobic — water beads up and rolls right off.
Unlike wax, which sits on top of the paint and wears off in weeks, ceramic coating becomes part of the surface and lasts years. According to Car and Driver, a properly applied ceramic coating can outperform traditional wax by a factor of ten in durability testing.
Ceramic coatings were originally developed for aerospace and industrial applications to protect surfaces from extreme heat and chemical exposure. The automotive version is a consumer-adapted formula of the same SiO2 (silicon dioxide) chemistry.
Why You Must Do Paint Correction Before Ceramic Coating
This is the most important thing in this entire guide. You cannot skip paint correction and go straight to ceramic coating.
Here is why: ceramic coating is crystal clear. It does not hide defects — it magnifies them. If you coat a swirled or scratched surface, you are locking those flaws in permanently under a hard shell. The only way to fix it afterward is to strip the coating and start over.
Think of it this way: paint correction gets the surface perfect. Ceramic coating preserves that perfection. The two processes are designed to work in sequence — not independently.
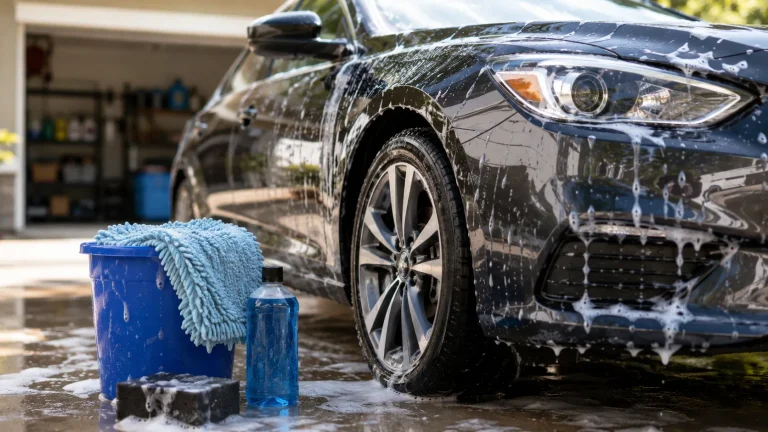
How Paint Correction and Ceramic Coating Work Together
Start with a thorough two-bucket wash. Follow it with an iron fallout remover spray and a clay bar treatment to strip embedded contaminants from the clear coat. The surface must be chemically clean before any polishing begins.
Use a paint depth gauge and a swirl-finder light or LED work light at different angles. This tells you where the defects are, how deep they go, and which correction level is needed. Do not skip this step.
Work panel by panel with a dual-action or rotary polisher. Start with the appropriate cutting compound for the defect level. Follow with a finishing polish. Wipe residue with a microfiber towel after each section and re-check under light.
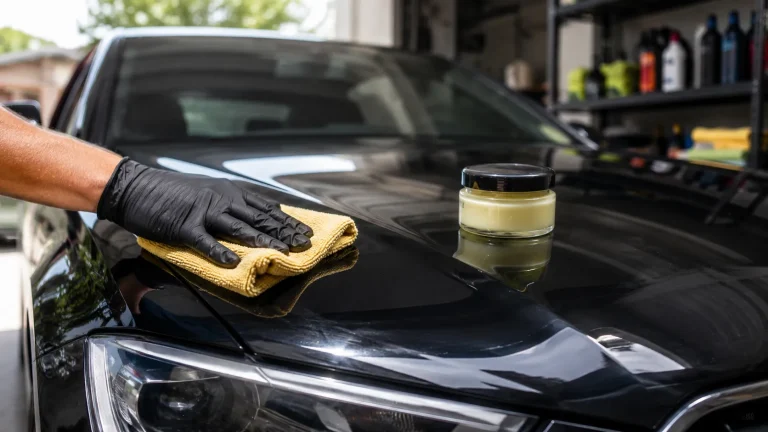
Once correction is complete, wipe every panel with an isopropyl alcohol (IPA) solution (10–20% diluted). This removes all polish oils and residues so the ceramic coating bonds properly. This step is non-negotiable.
Work in a garage or shaded area. Apply the coating in small sections using a suede or foam applicator block wrapped in a microfiber cloth. Cross-hatch each panel, let it flash (1–3 minutes depending on the product), then level with a clean microfiber towel.
Most ceramic coatings reach initial cure in 24–48 hours. Full hardness typically takes 2–4 weeks. Keep the car dry and away from bird droppings or tree sap during this period.
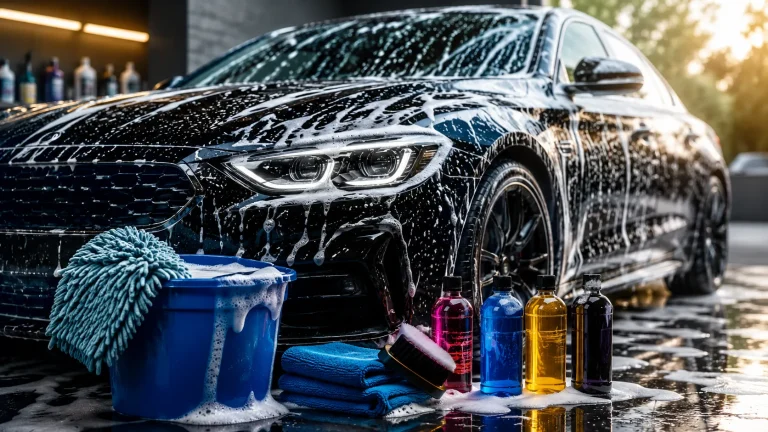
What You Will Need
For a full breakdown of detailing tools and top-rated car care kits, check out our car care guide — I’ve listed the exact products I use on my own vehicles there.
DIY vs. Professional Paint Correction and Ceramic Coating
Both options have their place. Here is a straightforward comparison to help you decide.
- Lower cost ($150–$500 for supplies)
- Full control over products used
- Learn a valuable skill
- Good for light-to-moderate defects
- Consumer-grade coatings still last 1–3 years
- Higher upfront cost ($500–$2,500+)
- Requires no skill or equipment from you
- Pro-grade coatings last 3–7 years
- Warranty often included
- Necessary for severe paint defects or exotic cars
I did my first DIY correction and coating on a 2016 Civic with moderate swirling. I used a Rupes LHR15 Mark III with Menzerna polishes and topped it with Gtechniq Crystal Serum Light. The whole process took me two full weekend days. The result? Honestly close to a professional job at about one-third the cost. But I had to make mistakes on a test panel first — do not skip that step.
Paint Correction and Ceramic Coating Cost Breakdown
Prices vary by vehicle size, paint condition, and the shop’s location and reputation. According to Consumer Reports, professional paint protection services have grown significantly in demand as more drivers look for alternatives to repainting worn vehicles.
Dos and Don’ts of Paint Correction and Ceramic Coating
- Always clay bar before polishing
- Panel wipe with IPA before applying ceramic coating
- Work in a shaded, dust-free environment
- Use a paint depth gauge to avoid cutting too deep
- Apply ceramic coating in small sections
- Let the coating cure fully before washing
- Use pH-neutral soap for all washes after coating
- Don’t skip paint correction before coating
- Don’t apply coating in direct sunlight or high humidity
- Don’t wash the car for at least 7 days after coating
- Don’t use abrasive cleaners after ceramic coating is applied
- Don’t let polish residue dry on the paint before buffing
- Don’t rush the cure time — it weakens the bond
Ceramic Coating Spec Sheet
Vehicle Compatibility
Paint correction and ceramic coating work on all painted vehicle types — sedans, trucks, SUVs, sports cars, motorcycles, and RVs. Matte and satin finishes require a matte-specific ceramic coating (standard coatings add gloss and will ruin a matte finish). Always confirm the product is rated for your paint type before applying. Vinyl-wrapped vehicles can also be coated but require a coating specifically formulated for vinyl.
Paint Correction and Ceramic Coating Comparison by Vehicle Age
| Vehicle Age | Typical Paint Condition | Recommended Correction Level | Ceramic Coat Recommendation |
|---|---|---|---|
| 0–2 years | Minor swirls from car washes | One-step polish or light correction | Consumer or pro-grade — both work well |
| 2–5 years | Moderate swirling, light oxidation | Two-step correction | Pro-grade recommended for longevity |
| 5–10 years | Heavy swirling, clear coat fade, water etch | Multi-stage correction | Professional application strongly advised |
| 10+ years | Oxidation, paint fade, possible clear coat failure | Professional assessment first — may need repaint in spots | Professional only; check clear coat thickness first |
Install Tips for Ceramic Coating
- Always wear nitrile gloves — cured ceramic on skin is stubborn and can cause irritation
- Work one panel at a time. Do not try to coat the whole car in one pass
- The flash time (when the coating hazes before leveling) varies by temperature — watch for the rainbow sheen, not the clock
- Use two microfibers to level: one to wipe off the bulk, a second clean towel to buff to clarity
- Coat in overlapping cross-hatch passes — horizontal then vertical — for full coverage
- Apply a second layer after 1–4 hours (product-dependent) for added depth and protection
- Keep a bright light source at a low angle while applying so you can see any missed or high spots immediately
After the IPA panel wipe, run a clean, dry microfiber towel across the paint. If it drags or squeaks instead of gliding smoothly, there is still contamination on the surface. Re-clay or re-wipe before applying the coating. Ceramic coating bonds best to a chemically bare surface.
Why Paint Condition Matters for Resale Value
Your car’s exterior paint is the first thing any buyer sees. A dull, swirled finish signals neglect — even if the mechanical components are perfect. A corrected, coated car looks newer, commands higher prices, and sells faster.
According to Edmunds, paint condition is one of the top three factors that affect a used vehicle’s trade-in and private sale value. Investing in paint correction and ceramic coating before selling can return more than the cost of the work in a higher sale price.
Even if you are not selling, a coated car is easier to keep clean. Contaminants do not stick as easily, wash-induced swirling is reduced, and your car stays looking fresher between details. If you spend time on exterior protection, you will probably enjoy our exterior accessories guide too — there are some great products in there for keeping your car’s finish protected day to day.
Ceramic coating products contain chemical solvents. Always work in a well-ventilated space. Wear nitrile gloves throughout the application process. Do not allow the product to contact your eyes or prolonged skin exposure. If coating in an enclosed garage, open the doors fully and use a fan to circulate air. Keep the product away from children and pets during application and cure.
How Long Does Paint Correction Last?
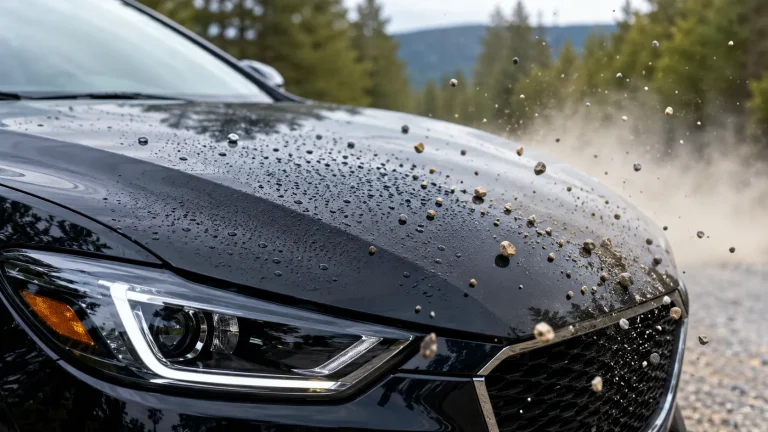
Paint correction itself is permanent — the defects are physically removed and do not grow back. However, new defects can form over time from automated car washes, road debris, and poor washing technique. That is exactly why ceramic coating matters: it creates a sacrificial layer that takes the abuse before your clear coat does.
With a ceramic coating on top and proper maintenance (pH-neutral soap, hand washes, no automatic brushes), a corrected finish can stay looking sharp for 3–5 years or more before needing attention again.
For more on long-term maintenance tools and products, our tools and garage gear guide covers polishers, foam cannons, and everything else you need to keep your car in top shape between full corrections.
For DIY users, the combination of a Rupes Bigfoot LHR15 Mark III dual-action polisher with Menzerna Heavy Cut Compound 400 for correction and Gtechniq Crystal Serum Light for coating is my go-to setup. It delivers professional-level results with a manageable learning curve — and the coating holds up for 3–4 years with proper maintenance.
- Paint correction must always come before ceramic coating — not after
- Together, they offer the most durable, high-gloss paint protection available short of a full respray
- DIY is cost-effective for light-to-moderate defects; professional is worth it for severe paint or high-value vehicles
- The total investment — whether $200 DIY or $1,500 professional — pays back in resale value and years of easier maintenance
- Proper prep (clay bar, IPA wipe, controlled environment) is what separates a great result from a wasted afternoon
Paint correction and ceramic coating are not optional extras for car enthusiasts — they are the smartest long-term investment you can make in your vehicle’s appearance. Do the correction first, prep the surface properly, apply the coating with patience, and your car will reward you with years of showroom-quality shine and a finish that is genuinely easier to maintain. If you are not confident doing it yourself, find a certified detailer and watch them work — you will learn fast.
Frequently Asked Questions
Yes — always. Ceramic coating is transparent and will lock in any existing swirls, scratches, or defects permanently. Paint correction must be done first to get a clean, defect-free surface before the coating goes on.
Paint correction results are permanent — the defects are removed and will not return unless new ones form. Ceramic coating lasts 1–3 years for consumer-grade products and 3–7 years for professional-grade coatings with proper maintenance.
Costs vary widely. A basic one-step correction with consumer ceramic coating starts around $400–$800. A full multi-stage correction with a professional-grade coating on a larger vehicle can run $1,500–$2,500 or more depending on paint condition and shop location.
Yes, for light-to-moderate defects. You will need a dual-action polisher, cutting compound, finishing polish, and a consumer ceramic coating kit. Budget $200–$500 for quality DIY supplies. For severe paint defects or luxury vehicles, a professional is a safer choice.
Initial cure takes 24–48 hours — keep the car dry during this period. Full hardness cure takes 2–4 weeks. Avoid bird droppings, tree sap, and automatic car washes during the full cure window.
Ceramic coating adds hardness and scratch resistance but does not make paint scratch-proof. It protects against light swirling, wash marring, and minor surface contact. Deep key scratches or hard impacts will still penetrate through the coating to the clear coat.
Wax is a surface-level protectant that lasts weeks and must be reapplied regularly. Ceramic coating bonds chemically to the paint and lasts years. Ceramic coatings also provide significantly better chemical resistance, UV protection, and hydrophobic performance than traditional wax.
Yes, but you must use a matte-specific ceramic coating. Standard ceramic coatings add gloss and will permanently alter a matte or satin finish. Always check the product label — matte-compatible coatings are formulated to preserve the flat appearance while still adding protection.
Final Thoughts
If there is one thing I want you to take away from this guide, it is this: the order matters. Paint correction first. Ceramic coating second. Always.
Done right, this combination is the closest thing to a permanent upgrade your car’s exterior can get without a full respray. The surface looks better, stays cleaner longer, and holds up against the daily abuse that every car in the USA faces — from road salt and summer UV to bird droppings and drive-through car wash brushes.
Start with an honest assessment of your paint. If it is in decent shape, a one-step polish and consumer coating is a solid weekend project. If it has been through years of neglect or automatic car washes, get a professional quote first. Either way, you will not regret investing in your paint. For more guides on keeping your car looking and performing its best, browse our car care guide — it covers everything from detailing kits to paint protection film comparisons.