How to Remove Ceramic Coating from Car Paint Without Damage
The most practical way to remove ceramic coating without damaging your paint is to use a dedicated chemical stripper (like CarPro Eraser or Gtechniq Panel Wipe) or a light abrasive polish with a dual-action polisher, working in small sections and checking frequently. The key limitation is that this is a time-consuming, physically demanding process requiring proper safety gear (gloves and ventilation) and a machine polisher, since hand-applied chemicals or overly aggressive compounds can etch or burn through your clear coat.
Learning how to remove ceramic coating from car paint is a skill that becomes necessary when your coating has failed, developed stubborn water spots, or you simply want to start fresh with a different protection product. While ceramic coatings are engineered to last for years, they aren’t permanent. And removing them takes far more than a strong car wash soap — it takes mechanical abrasion, chemical strippers, or both. With the right tools and technique, you can strip the coating safely without damaging your clear coat. Done wrong, however, removal can cost you thousands in paint repair.
We’ll walk you through the tools you need, the two main removal methods, the step-by-step process, and the mistakes that can ruin your paint. We’ll also cover when it’s smart to hire a professional instead. If you’re just looking for a quick overview before diving deeper, our general guide on how to remove ceramic coating covers the basics in a more compact format.
## Why You Might Need to Remove Ceramic Coating
Ceramic coatings offer excellent protection against UV rays, chemical stains, and minor scratches. But they aren’t flawless. Several scenarios can push you toward removal:
– Coating failure: Delamination, hazing, or peeling after a few years of service
– Stubborn contamination: Embedded water spots, bird droppings, or etching that won’t come out with normal washing
– Poor application: Streaks, high spots, or uneven curing from a rushed DIY job
– Paint correction: You want to do paint correction work, but the coating blocks access to the clear coat
If you’re experiencing any of these problems, removal is the only way to get your paint back to a clean, workable surface.
## What You’re Actually Removing
Ceramic coatings bond at a molecular level to your clear coat. They form a hard, glass-like layer that’s chemically resistant to most automotive chemicals. That’s why simple soap and water won’t touch them. You need mechanical abrasion or a chemical stripper specifically designed to break down the silica bonds.
Most consumer-grade ceramic coatings are between 1 and 3 microns thick. Your clear coat, by comparison, is typically 30 to 50 microns on factory paint. That gives you some margin, but it’s not unlimited. Aggressive cutting with a rotary buffer can eat through clear coat in seconds.
Ceramic coatings are rated on the Mohs hardness scale. Most consumer coatings rate between 7 and 9, while your car’s clear coat typically rates around 2 to 3. That’s why the coating is so hard to remove — it’s physically harder than the surface it protects.
## Tools and Supplies
Before you start, gather everything you need. Rushing this job is the fastest way to damage your paint.
Never use a rotary buffer unless you have professional training. A rotary buffer can generate enough heat and friction to burn through clear coat in seconds. Stick with a dual-action polisher for safer, more forgiving results. Always wear eye protection and a respirator when working with compounds and chemical removers.
## Removal Methods: Mechanical vs. Chemical
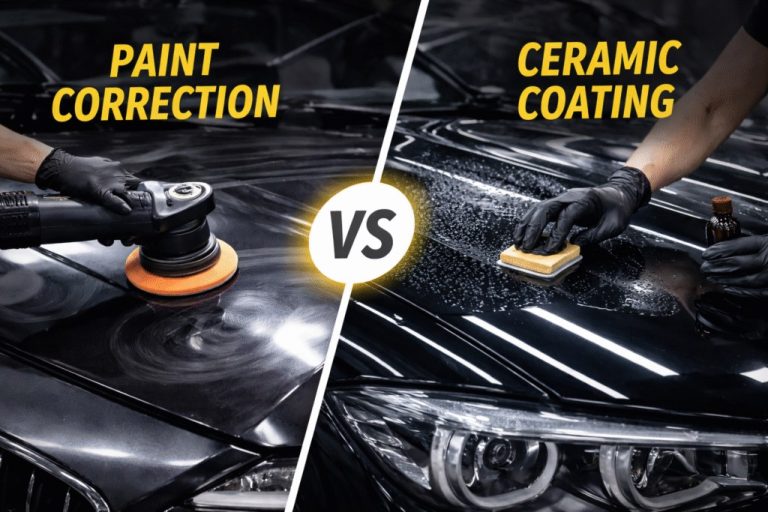
There are two main approaches to removing ceramic coating: mechanical abrasion and chemical stripping. Each has pros and cons, and the right choice depends on your situation.
| Method | Best For | Key Consideration |
|---|---|---|
| Abrasive polishing | Most DIY users; works on all coating types | Requires a polisher; removes a thin layer of clear coat |
| Chemical remover | Thin or failing coatings; less clear coat risk | Not all products work on all coatings; strong fumes |
| Professional machine polish | Thick coatings or minimal clear coat margin | Highest cost; safest for tricky panels |
### Abrasive Polishing: The Most Common Route
This is the method most professional detailers use. You’re essentially abrading off the coating layer by layer with a cutting compound and a polishing pad. It’s effective because ceramic coatings are harder than clear coat but still break down under the right compound.
Start with a medium-cut compound and a cutting pad. Work in small sections — about 2 feet by 2 feet — and use slow, overlapping passes. Check your progress frequently by wiping the area with an IPA solution. The coating is gone when water behaves differently on the surface and you see bare clear coat.
Test a small, hidden area first — like the inside of the door jamb or trunk lid — to gauge how many passes it takes to break through the coating. This gives you a reference point before you work on visible panels.
### Chemical Strippers: The Gentler Alternative
Some manufacturers make dedicated ceramic coating removers that weaken the silica bond. These products are sprayed or wiped on, allowed to dwell, and then wiped off with the coating. They’re less aggressive on clear coat but may not work on every coating type.
Chemical removers tend to work best on coatings that are already failing or have been applied thinly. If your coating is still in good shape and only a year old, a chemical remover might struggle to break through.
Chemical ceramic coating removers vary widely in formulation and effectiveness. Check the product label for compatibility with your specific coating brand and follow the manufacturer’s dwell time and ventilation instructions exactly. Some removers require multiple applications.
### What NOT to Use
A common mistake is reaching for household chemicals to strip ceramic coating. Acetone, brake cleaner, paint thinner, and other aggressive solvents can damage your clear coat, plastic trim, and rubber seals. They may also leave residue that’s nearly impossible to remove. Stick with products designed specifically for automotive paint. If a product isn’t labeled safe for clear coat, don’t use it.
## Step-by-Step Removal Process
Here’s a proven workflow that will get your paint back to bare clear coat without damage.
Give the car a thorough two-bucket wash, then use a clay bar or iron remover to strip bonded contaminants. You can’t abrade a dirty surface without scratching it.
Use painter’s tape to protect rubber trim, plastic moldings, emblems, and edges. Cutting compound can stain or damage unpainted surfaces.
If you have a paint depth gauge, measure several panels. This tells you how much clear coat you have to work with. Anything below 20 microns means you should call a professional.
Apply a dime-sized amount to a cutting pad. Work a 2×2 foot section at speed 4-5 on your polisher. Use slow passes, about 1 inch per second, with moderate pressure.
After 3-4 passes, wipe the area with an IPA solution. If you still see coating, continue. If you see bare clear coat, move on. Don’t over-polish.
Once the coating is gone, switch to a lighter polishing compound and a polishing pad to remove any haze left by the cutting compound.
Wipe the entire car with an IPA solution to remove any residue. Inspect under good lighting for swirls, haze, or remaining coating spots.
If your clear coat measures below 20 microns, do not attempt mechanical removal. You risk burning through to the base coat or primer. Professional paint restoration is the safer route in this scenario.
## Common Mistakes to Avoid
Removing ceramic coating is one of the most paint-damaging jobs you can attempt at home. Avoid these pitfalls.
- Work in small sections and check progress often
- Use a dual-action polisher instead of a rotary buffer
- Test on a hidden panel first
- Measure clear coat thickness before starting
- Follow compound manufacturer speed and pressure guidelines
- Don’t use a rotary buffer without professional training
- Don’t apply heavy pressure or stay in one spot too long
- Don’t attempt removal on a hot panel or in direct sunlight
- Don’t skip the IPA wipe-down between steps
- Don’t mix chemical removers with other solvents
## After Removal: Paint Care and Reapplication
Once the coating is off, your clear coat is exposed and more vulnerable. You have two options: reapply a fresh ceramic coating or switch to a traditional wax or sealant.
If you’re reapplying, the surface needs to be perfectly clean and free of oils. Use an IPA wipe-down or a panel prep solution to ensure the coating bonds properly. If you’re going back to wax or sealant, you can apply it immediately after polishing.
If you removed the coating because of water spotting or etching, the underlying clear coat may still show those marks. Consider a dedicated paint correction step before reapplying any protection. A good polish will remove light etching and restore gloss.
If you’re deciding whether to reapply, consider what went wrong the first time. If the coating failed due to improper curing or poor prep, the same issues will likely return. Read up on the best ceramic coating for cars to choose a product that fits your skill level and maintenance routine. Also, understanding how long does ceramic coating last will help set realistic expectations for your next application.
## When to Call a Professional
Some situations are simply not DIY-friendly:
– Clear coat is already thin: Under 20 microns measured with a gauge
– Large panels with complex curves: Roofs, hoods, and pillars are easy to over-polish
– You don’t own a polisher: Hand polishing a full car is exhausting and rarely produces even results
– The coating is thick or multi-layered: Some professional coatings are applied in 2-3 layers and require aggressive cutting
Professional removal typically ranges from $200 to $500 depending on your market and the condition of the paint. That’s a fraction of the cost of a respray if you burn through your clear coat.
If you’re considering removing the coating from glass surfaces as well, the process is different. Glass is much harder than clear coat, so you can use more aggressive methods. Check out our guide on how to remove ceramic coating from glass for specific steps.
## Final Thoughts
Removing ceramic coating is a delicate but achievable task for most car owners with the right tools and patience. The key is to work slowly, check your progress constantly, and never push beyond your comfort level. If you’re unsure about your clear coat thickness or your ability to use a polisher safely, invest in professional help.
For most people, the mechanical polishing route is the most reliable and cost-effective option. It removes the coating, corrects minor imperfections, and leaves your paint ready for whatever protection you choose next.
Removing ceramic coating from car paint is a job best done with a dual-action polisher, a medium-cut compound, and plenty of patience. Measure your clear coat first, work in small sections, and don’t hesitate to call a professional if the numbers look tight. Once the coating is off, you’re free to reapply a fresh layer or switch to a simpler protection routine.
- Coating Assessment: Confirm the coating is actually ceramic and check its condition; a dedicated remover or.
- Abrasive Polish: Use a fine or medium-cut polishing compound with a foam pad—avoid harsh solvents or.
- Machine Polishing: A dual-action polisher delivers even, controlled removal; work in small sections and keep the.
- Safety First: Wear nitrile gloves, a respirator, and eye protection, and work in a ventilated area—ceramic.
- Post-Removal Care: After stripping, wipe down with an IPA solution and immediately reapply wax, sealant, or.